|
Programming Taskbook |
|
|
||
|
Electronic problem book on programming |
||||
|
© M. E. Abramyan (Southern Federal University, Shenzhen MSU-BIT University), 1998–2026 |


|
|
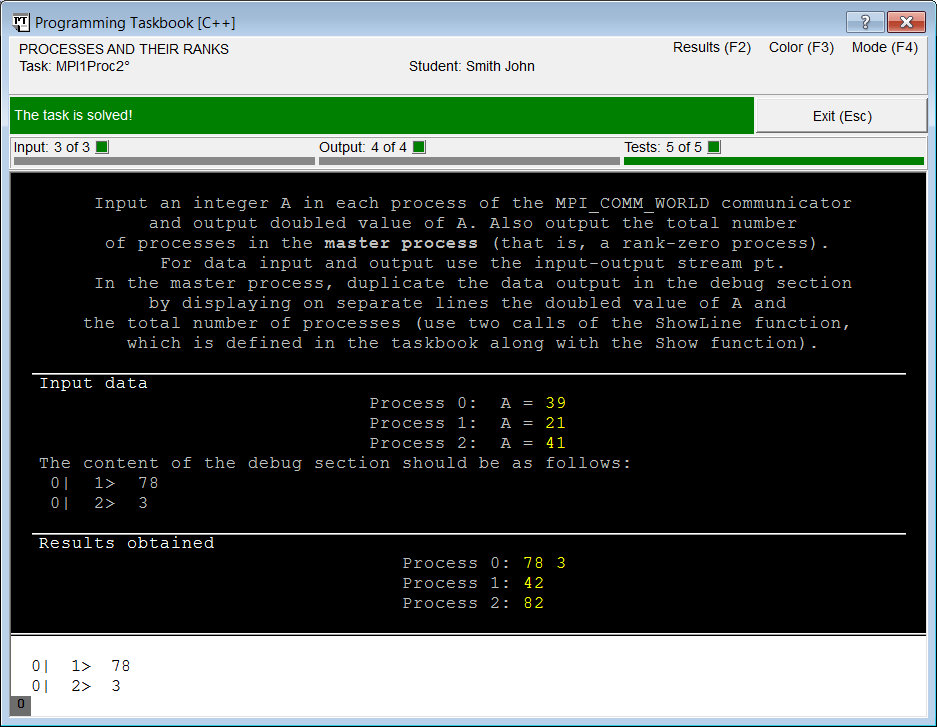
Using the debug sectionIf you carefully analyze the solution in the previous section, you can see that it is incomplete, because the task requires to output some data not only in the results section, but also in the debug section. We already saw the debug section on the previous stages of task solving: it showed additional information about the errors that occurred in the slave processes. The other function of this section is to enable you to display various debugging data. This feature is especially important when developing parallel programs, since standard debugging tools, such as breakpoints, cannot be used for them. The additional part of the task MPI1Proc2 (and some other tasks of the MPI1Proc group) is devoted to using different options of debugging information output. Although the Programming Taskbook does not analyze the content of the debug section, this part of the task execution is as compulsory as the output of the results into the results section, but it should be checked not by the Programming Taskbook itself, but by the teacher. The Programming Taskbook simply notes that "from its point of view" the task is solved, but the final decision on whether the given solution is correct should be taken by the teacher (in this case, in particular, he pays attention to the means by which the task was solved, to efficiency of the solution, etc.). Note that the data in the debug section is also required in the tasks of the MPI2Send group, related to the study of non-blocking data transfer functions, as well as in the tasks of the MPI8Inter group associated with the dynamic creation of processes. Recall the final part of the MPI1Proc2 task: "In the master process, duplicate the data output in the debug section by displaying on separate lines the doubled value of A and the total number of processes (use two calls of the ShowLine function, which is defined in the taskbook along with the Show function)." Note also that in the "Input data" section of the Programming Taskbook window you can see a comment explaining how the debug section should look like with the correct solution (see any of the screenshots with the Programming Taskbook window in the previous section). To display data in the debug section, two functions are provided in the Programming Taskbook: Show and ShowLine. Each of these functions has several overloaded versions that allow to customize the format of the output data and provide additional comments. The main difference between these functions is the following: the ShowLine function additionally breaks current line of the debugging section after the data output, while the Show function does not do this (however, when the right margin of the debug section will be reached, a current line will also be broken).
Remark. A full description of all features connected with debug output is given in the
information window in the section "Debugging". If the Programming Taskbook window is
active, then you can display the information window by clicking the button To get the required content of the debug section, it's enough to add two ShowLine function calls to the end of the Solve function. Since the required data should be output only in a part of the debug section that is associated with the master process, these function calls should be placed in the conditional statement which is already present in the program. We give the final part of the Solve function, which contains the complete solution of the task: int a;
pt >> a;
pt << 2 * a;
if (rank == 0)
{
pt << size;
ShowLine(2 * a);
ShowLine(size);
}
After running a new variant of program and checking it on five test sets of data, the Programming Taskbook window appears on the screen:
Comparing the contents of the debug section with the sample given in the "Input data" section, we are convinced that the task solution is now completely finished. Note that since in this case the debug section contains only the data from the master process, a single "0" marker corresponding to this process is displayed on the lower border of the window. So, we completely fulfilled the MPI1Proc2 task. During its solution, we learned how to create a project template, studied features of launching parallel programs and features of the Programming Taskbook that simplify their launching from the IDE. We learned about the Programming Taskbook tools to input the initial data, output the results and display information in the debug section. In addition, we saw how the Programming Taskbook handles various types of errors. All this information will be useful when we will solve tasks devoted to the main features in MPI technology: various ways of messaging between processes of a parallel application.
|
 on the right side
of the Programming Taskbook window caption or by pressing the [F1] key.
on the right side
of the Programming Taskbook window caption or by pressing the [F1] key.
|
|
Designed by |
Last revised: |